Board Designer
Designing a board
Starting a board
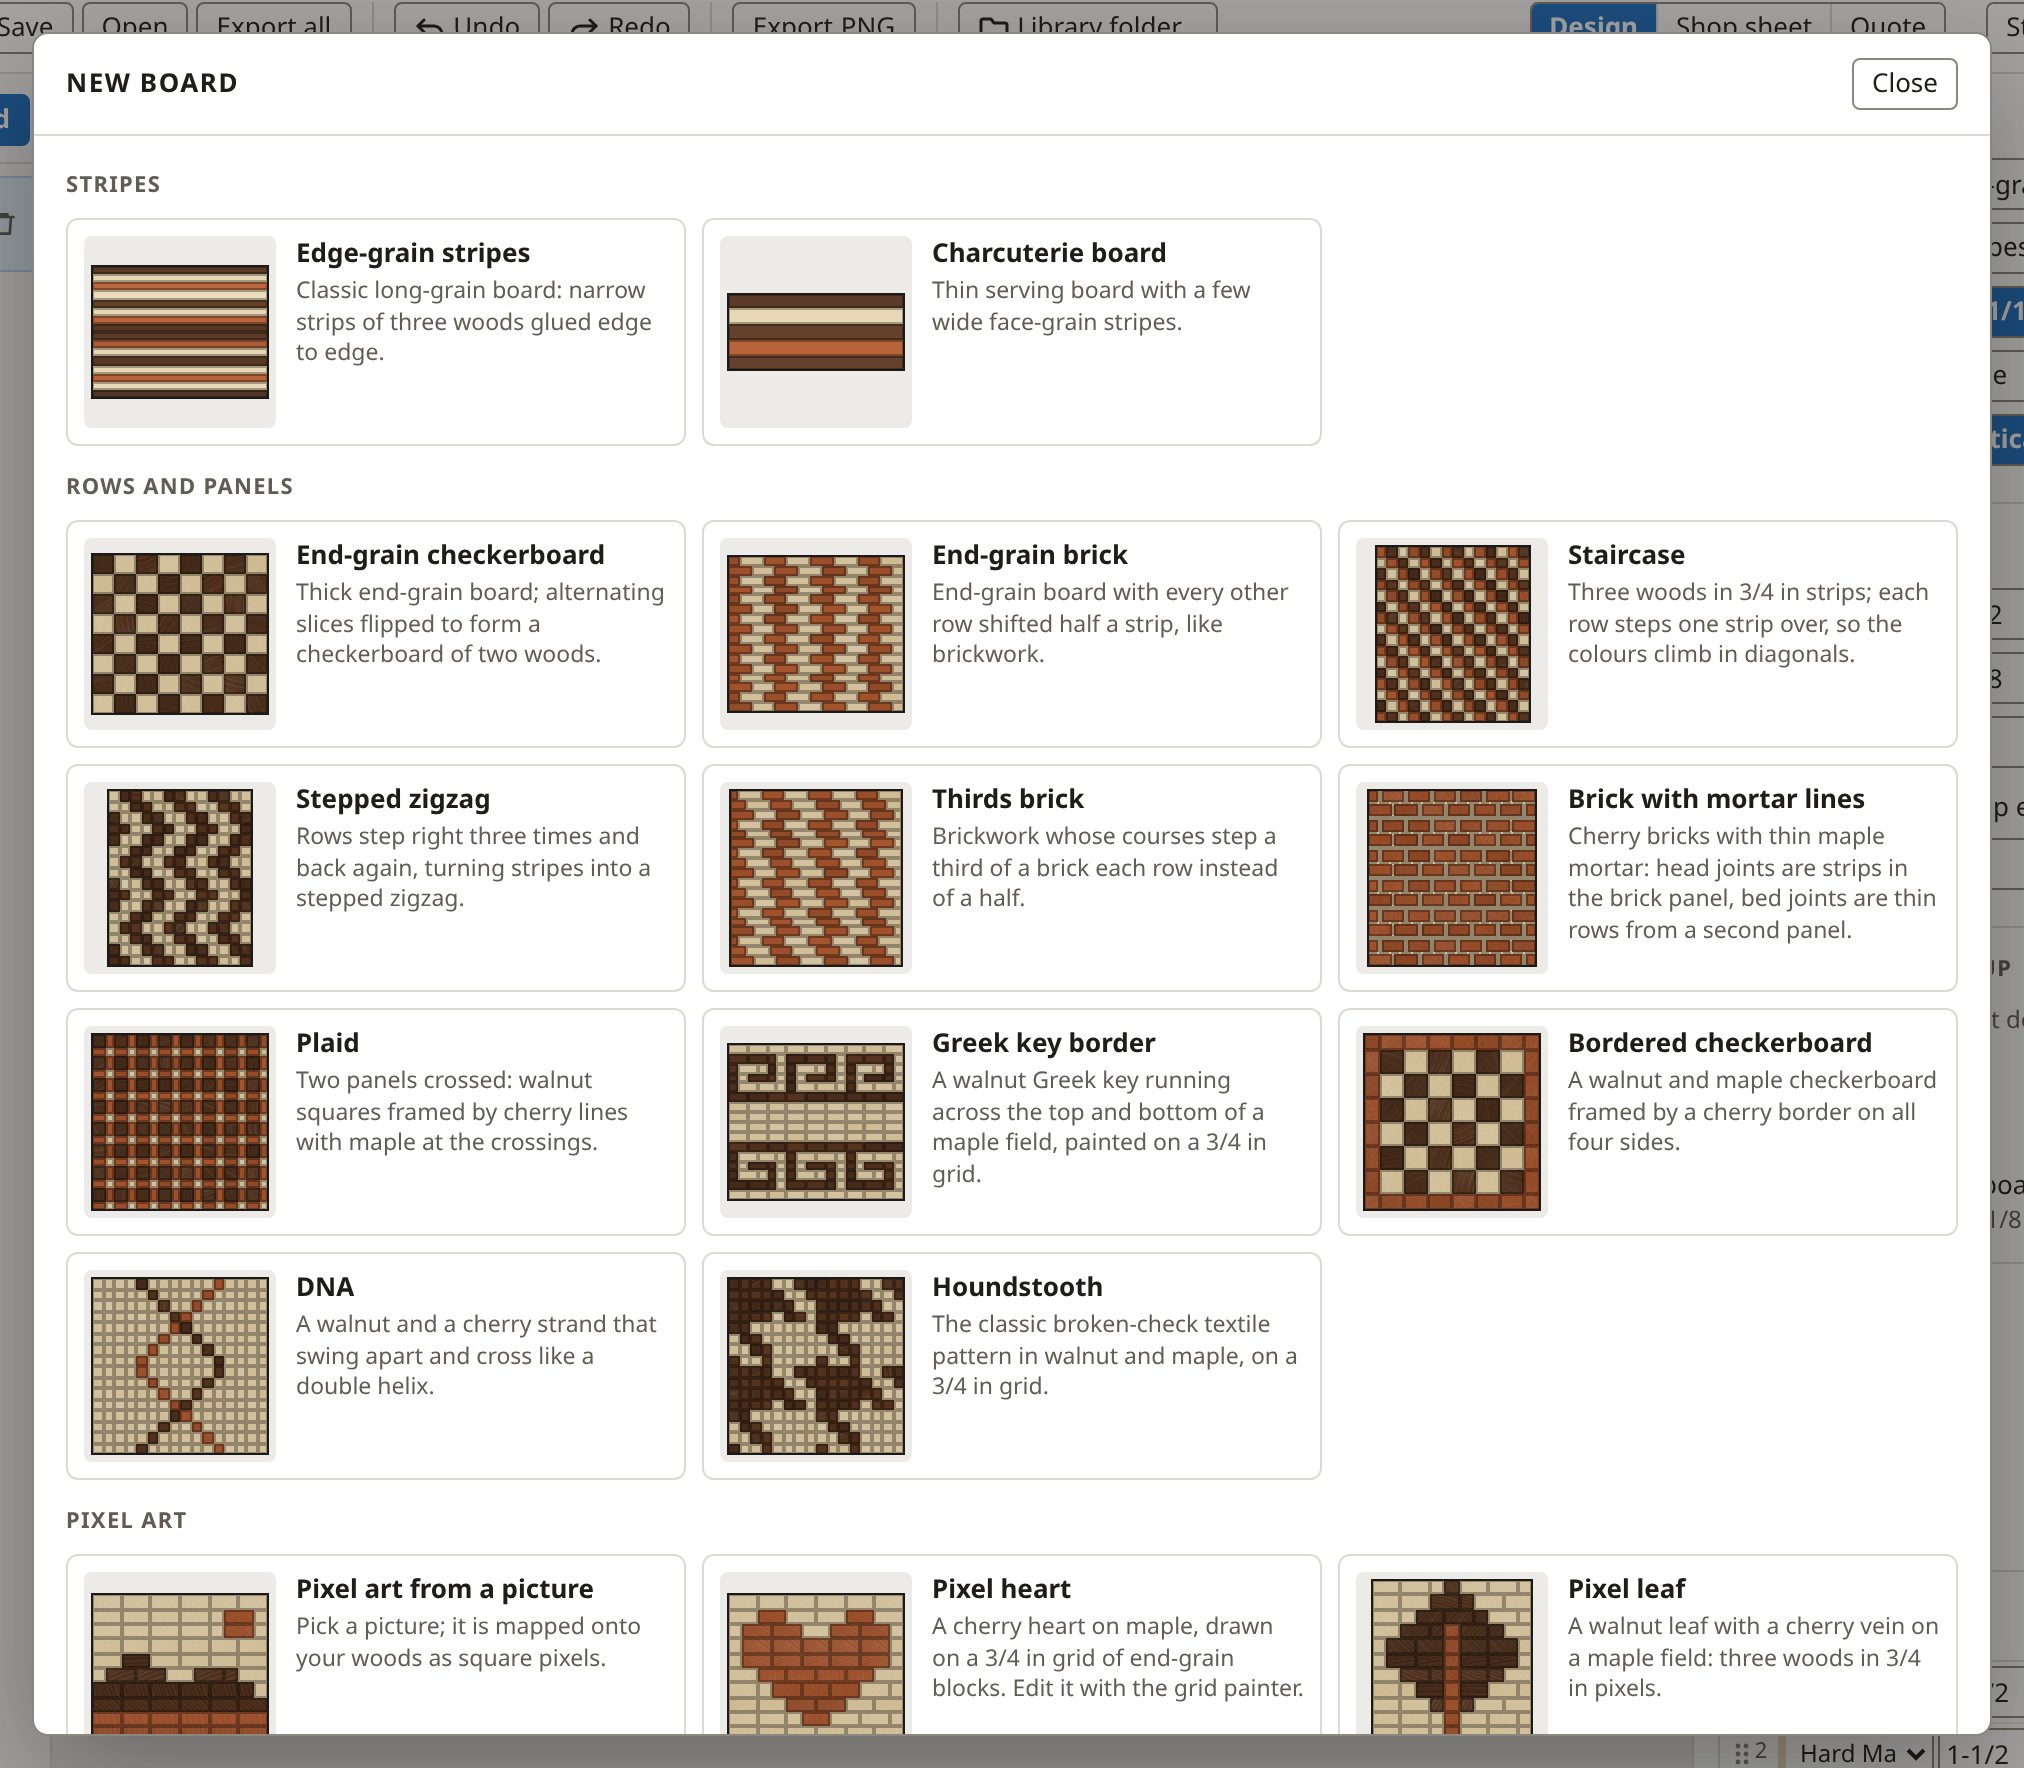
You click New board to open the gallery of starters, grouped by family, each with a picture. Pick one and it becomes a new board you can change in every way. The free app keeps two designs at once; Pro keeps as many as you like.
Construction and direction
You choose the Construction: edge grain (strips on edge), face grain (strips laid flat) or end grain (a strip panel cut into rows and glued up again, end grain up). Strip direction turns the strips to run across or along the board.
Strips
You add, remove and reorder strips in the list, picking each strip's wood and width. Or you type them as shorthand: the width, then the wood's code,
for example 1-1/2W 3/4HM 1-1/2W for walnut, hard maple, walnut. A strip that the stock already gives at its width, with no rip, is marked
"no rip".
Size
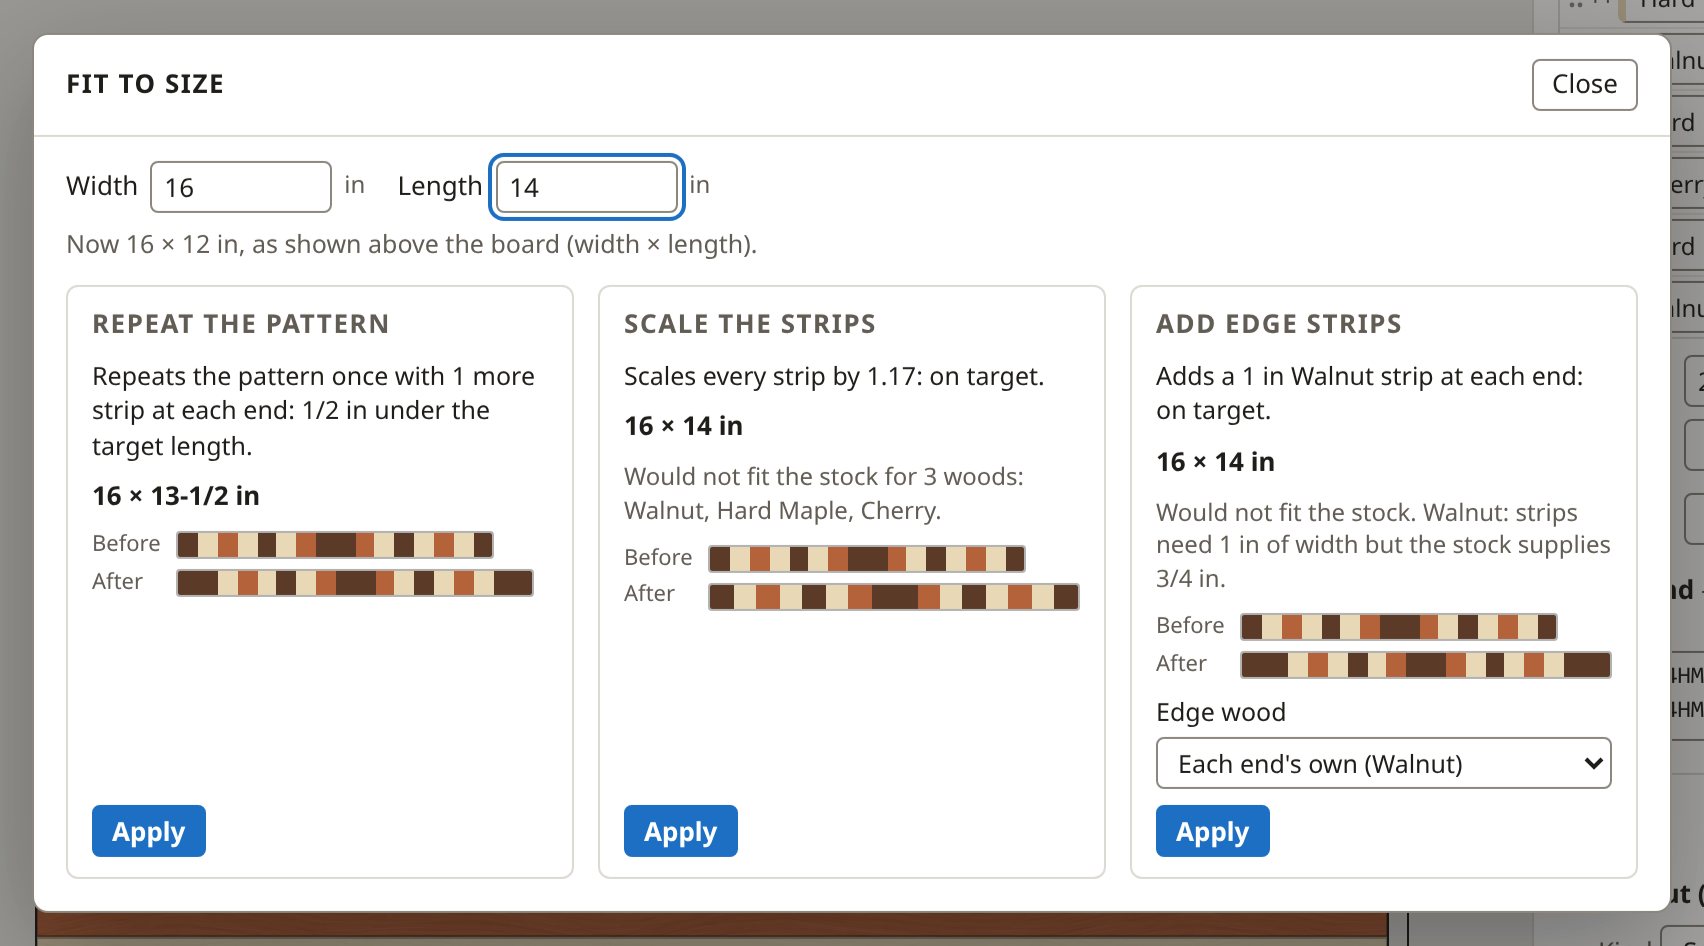
You set the length and the thickness; the width follows from the strips. For an end-grain board you also set the row height and the number of rows. Fit to size offers the nearest ways to reach a target width and length (repeating the pattern, scaling the strips, adding an edge strip), each with the size it lands on.
Stock
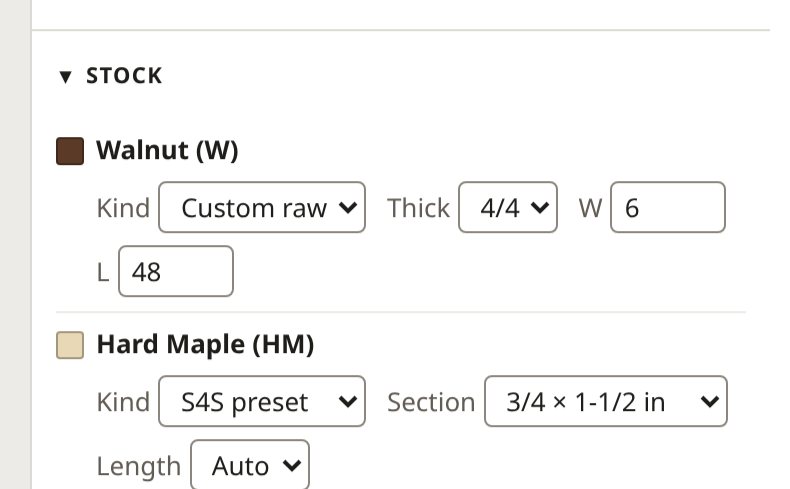
Each wood has its own stock: a ready-surfaced (S4S) preset section and length, a custom S4S size, or rough lumber by its quarter thickness. With the length on Auto, the app picks the stick length that needs the fewest glue-ups (or the least wood, if you prefer that in Settings).
Looking at it
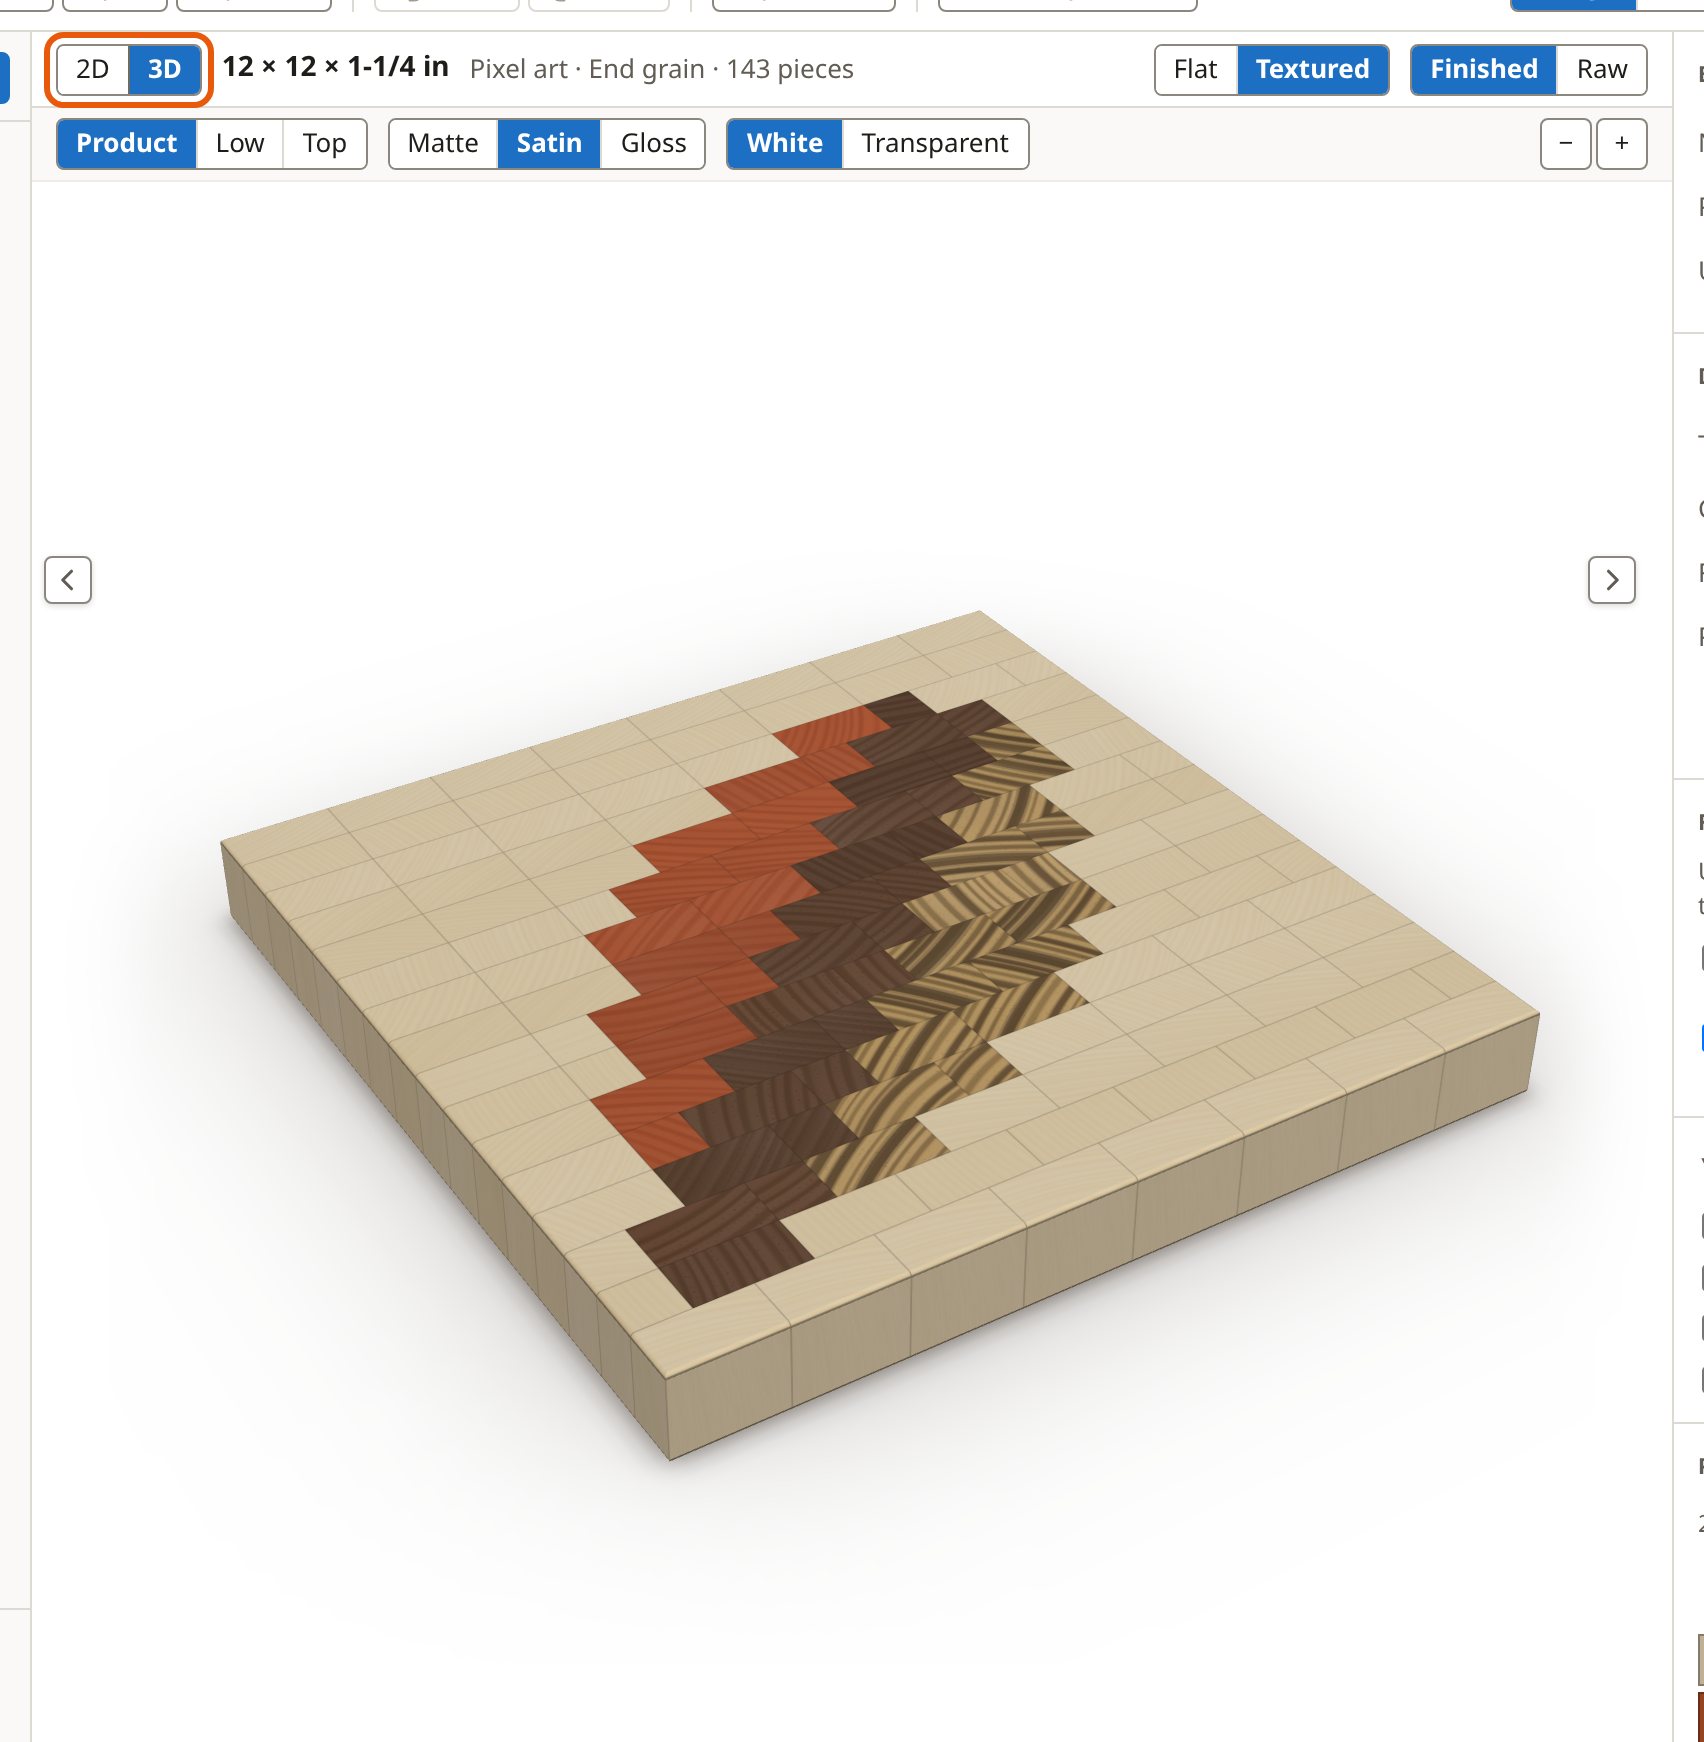
You switch between the flat 2D view with its dimensions and a 3D view you can turn. Wood textures, and the light or dark theme, are in Settings. Export PNG saves a picture of the board. Undo and Redo step through every change.